
How to Build the Perfect Tool Kit for Women’s DIY Projects
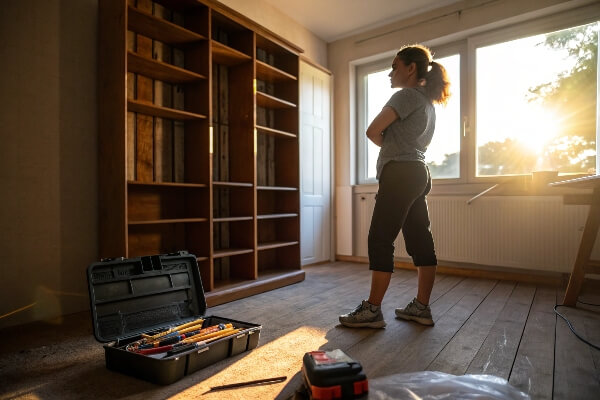
Are you tired of waiting for someone else to fix things around your house? Do you want to feel empowered to tackle your own home projects? Many women are taking control of their homes, with over 50% preferring to do their own repairs!
Building your own DIY tool kit is the first step! I’ll show you what every woman needs for home improvement, and how to stay safe.
It might seem hard to build your own tool kit, but I will help you. First, let's explore why a tool kit made just for women can make all the difference.
Why a Women-Focused DIY Tool Kit Makes a Difference?
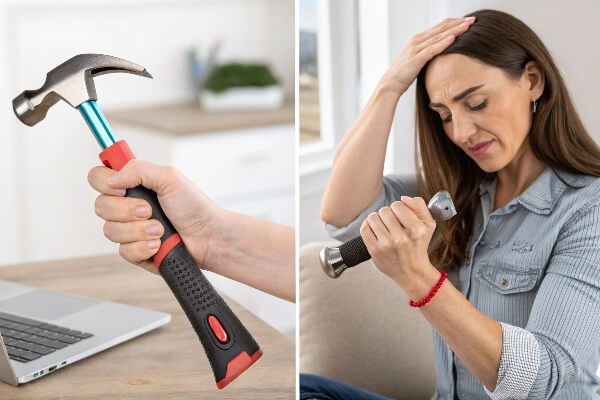
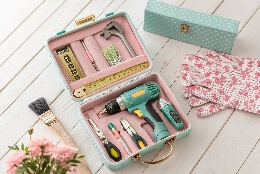
Have you ever used a tool that felt too big or heavy? Did you feel like you couldn't properly grip it? Tools are often designed for larger hands and stronger builds, which can be a problem if you are a woman.
Women's tool kits have tools with smaller grips and lighter designs, so you can complete projects more comfortably and safely. This can grow your confidence!
Using ill-fitting tools can cause fatigue in your hands and arms, and even lead to injuries. With tools designed for female ergonomics, however, you will feel empowered and independent. With a tool kit made for you, you can tackle projects confidently and not rely on others!
To delve even deeper, consider the following:
| Feature | Traditional Tools | Women-Focused Tools |
|---|---|---|
| Grip Size | Often larger, designed for male hands | Smaller diameter grips for better control |
| Weight | Heavier, can cause fatigue | Lighter materials for reduced strain |
| Ergonomics | May not consider female anatomy | Designed with female anatomy in mind |
| Comfort | Can be uncomfortable for extended use | Enhanced comfort for longer use |
| Safety | Increased risk of slips due to poor grip | Reduced risk with better grip and lighter weight |
By choosing tools that are designed with women in mind, you're not just buying equipment but investing in your comfort, safety, and confidence.
Core Tools Every Women’s DIY Kit Should Include?
What tools are the most important to have? To start, every basic DIY tool kit needs some must-have items.
Every tool kit should have a compact cordless drill, a lightweight hammer, a multi-bit screwdriver set, a utility knife, a level, and a tape measure, as well as pliers, a wrench, and a stud finder.
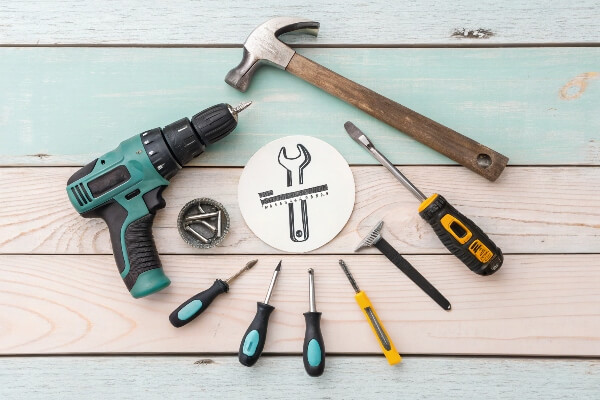
The cordless drill is essential for assembling furniture, hanging pictures, or any task that involves screws. A lightweight hammer with a cushioned grip will make hammering nails more comfortable and prevent hand fatigue. The multi-bit screwdriver set ensures you're prepared for various screw types without needing multiple screwdrivers. In addition, a utility knife, level, tape measure, pliers, wrench, and stud finder are indispensable!
For more details, let's look at a more detailed list:
| Tool | Description | Why It's Essential |
|---|---|---|
| Cordless Drill | Compact, lightweight, with variable speed settings | Powers through drilling and screw-driving tasks efficiently; adjustable settings prevent stripping screws. |
| Hammer | Lightweight with cushioned grip | Drives nails without causing hand fatigue; cushioned grip enhances comfort and control for accurate hammering. |
| Screwdriver Set | Multi-bit set with magnetic tips | Handles various screw types and sizes; magnetic tips hold screws in place for easy insertion and removal. |
| Utility Knife | Retractable blade for safety | Cuts through cardboard, plastic, and other materials; retractable blade ensures safe storage when not in use. |
| Level | Small, lightweight | Ensures accurate alignment for hanging pictures, shelves, and more; compact size for easy handling and storage. |
| Tape Measure | 25-foot length with easy-to-read markings | Measures distances accurately for project planning and material cutting; clear markings for precise measurements. |
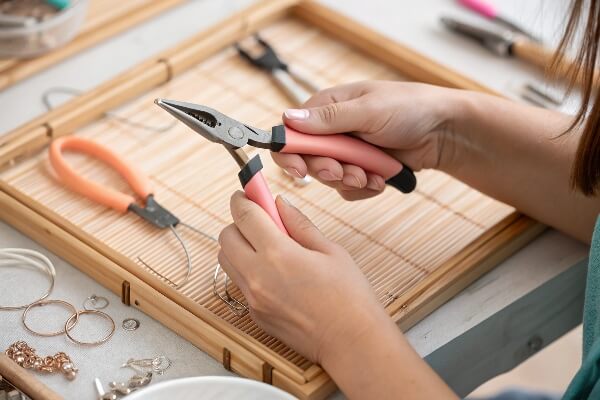
| Pliers | Combination pliers with comfortable grips | Grips, twists, and cuts wires and other materials; comfortable grips reduce hand fatigue during repetitive tasks. |
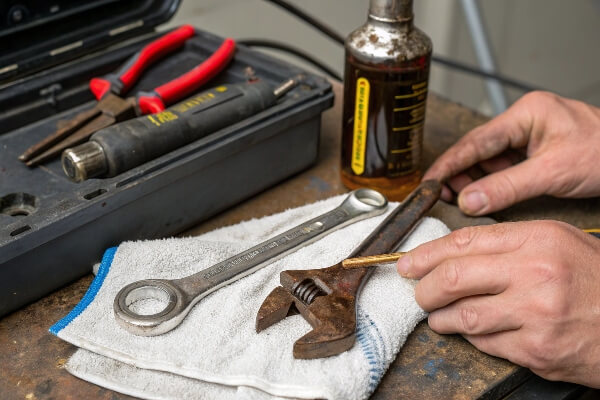
| Wrench | Adjustable wrench with wide jaw | Tightens and loosens bolts and nuts; adjustable jaw accommodates various sizes for versatility. |
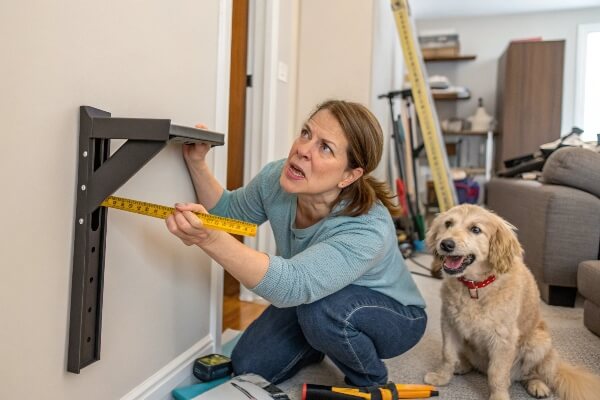
| Stud Finder | Electronic stud finder with indicator | Locates studs behind walls for secure mounting; electronic sensors ensure accurate detection for safe and reliable installation. |
Add-Ons for Specialized DIY Projects?
What if you want to do more specialized projects around the house? Well, there are some tools you should add to your DIY tool kit.
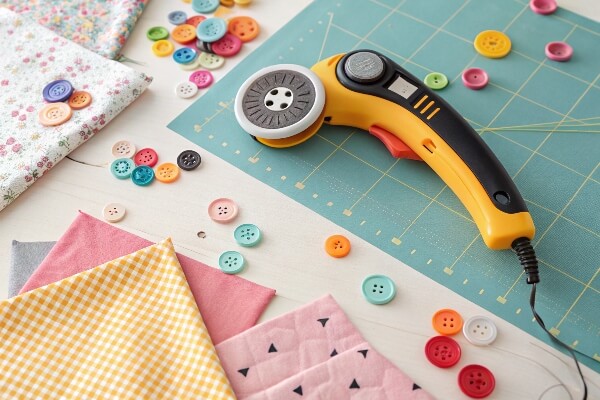
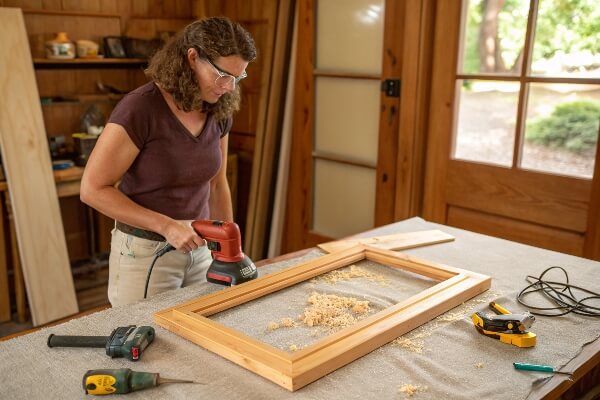
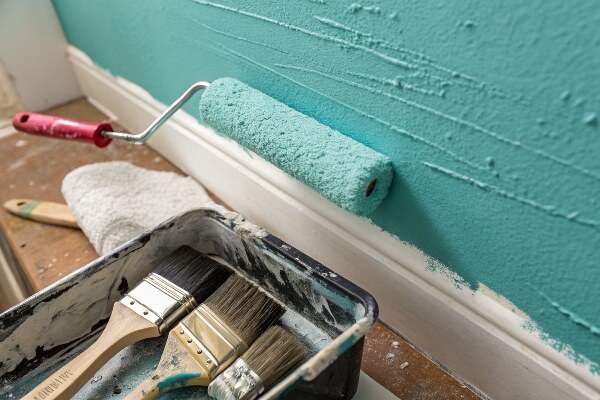
Consider adding a hot glue gun, rotary cutter, cutting mat for crafting. Include a hand saw, clamps, palm sander for woodworking. For home repair, a putty knife, wire cutters, and sealant gun are great! Lastly, for painting, think about angled brushes, mini rollers, and drop cloths!
Having add-ons to your tool kit helps you broaden the range of projects you can tackle. These tools lets your creativity flow and allows you to personalize your living space. Whether you want to start a woodworking project, repair walls, do crafts, or paint, having a well-equipped tool kit makes all the difference.
Here is a breakdown by project:
| Project Type | Tool Recommendations | Why It Enhances the Project |
|---|---|---|
| Crafting | Hot glue gun, rotary cutter, cutting mat | Allows for intricate bonding and cutting with precision; rotary cutter and cutting mat provide smooth, accurate cuts for fabric and paper crafts. |
| Woodworking | Hand saw, clamps, palm sander | Enables shaping and smoothing wood; clamps provide secure holding for gluing and assembly; palm sander sands surfaces for a smooth finish. |
| Home Repair | Putty knife, wire cutters, sealant gun | Facilitates patching holes, repairing electrical wiring, and sealing gaps; putty knife fills imperfections; wire cutters trim wires; sealant gun applies caulk or sealant. |
| Painting | Angled brushes, mini roller, drop cloths | Creates clean lines and covers small areas; mini roller provides even coverage on walls and furniture; drop cloths protect floors and furniture from paint splatters. |
DIY Safety Tips Every Woman Should Know?
Safety should always come first when doing DIY projects! What are some safety tips every woman should know?
Always wear protective gear like gloves, goggles, and dust masks. Learn how to use power tools and blades safely, and be aware of common mistakes that can lead to injury.
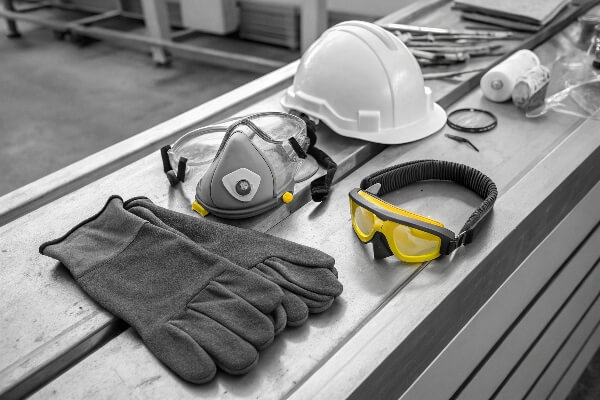
Safety is often overlooked, but it's crucial for preventing accidents. Wearing the right protective gear, like gloves and goggles, prevents scratches, cuts, and eye injuries. Understanding how to use power tools correctly can minimize the risk of accidents.
Let's get into more details:
| Safety Aspect | Recommendations | Why It's Important |
|---|---|---|
| Protective Gear | Wear gloves, goggles, and dust masks | Prevents injuries from splinters, dust, and debris; protects eyes from flying particles and airborne irritants; reduces the risk of respiratory problems. |
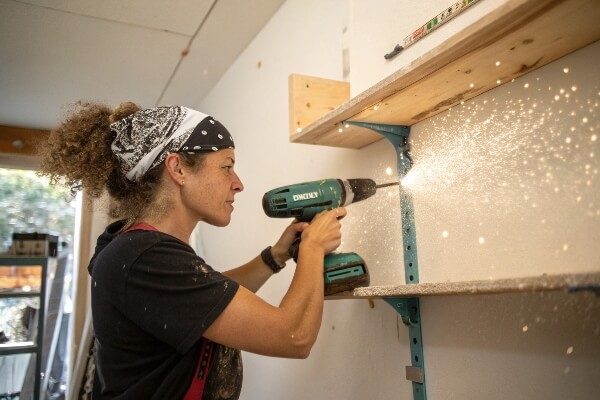
| Power Tool Usage | Read the user manual thoroughly; never remove safety guards; always unplug when changing bits or blades | Ensures safe operation of power tools; prevents accidental start-ups and injuries while making adjustments. |
| Blade Safety | Use sharp blades; cut away from your body; secure materials with clamps | Sharp blades require less force and reduce the risk of slipping; cutting away from the body avoids accidental cuts; clamping materials prevents movement during cutting. |
| Common Mistakes | Not wearing safety gear; using dull blades; rushing through projects | Wearing safety gear is a must; dull blades increase the risk of accidents; rushing can lead to mistakes and injuries. |
Smart Storage & Organization for Your Toolkit?
With the right tools, it's important to store and organize them! What’s the best way to do that?
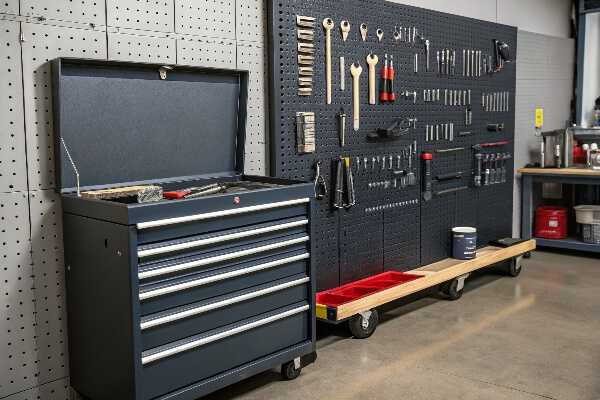
You could use tool bags or rolling toolboxes. Pegboards, magnetic strips, and drawer inserts can keep tools visible and within reach. Labeling and sorting by project helps you get what you need quickly.
Effective tool storage not only keeps your workspace tidy but also saves time and prevents frustration. A disorganized toolkit can lead to wasted time searching for the right tool and increase the risk of misplacing items. The right storage makes your DIY experience more efficient.
Consider these storage solutions:
| Storage Type | Description | Benefits |
|---|---|---|
| Tool Bags | Portable bags with multiple compartments | Easy to carry from one project to another; provides dedicated space for each tool. |
| Rolling Toolboxes | Wheeled boxes with drawers and compartments | Offers ample storage space for larger tools and accessories; easy to move around the workspace. |
| Pegboards | Boards with evenly spaced holes for hanging tools | Keeps tools visible and within easy reach; customizable layout for optimal organization. |
| Magnetic Strips | Strips with magnets for holding metal tools | Provides quick access to commonly used tools; saves space on work surfaces. |
| Drawer Inserts | Inserts designed to fit into drawers with dividers for organizing small parts and tools | Prevents items from rolling around in drawers; allows for easy sorting and retrieval of specific tools and hardware. |
| Labeling and Sorting | Label toolboxes, drawers, and compartments by project type or frequency of use | Simplifies the process of finding the right tools for each task; reduces the time spent searching for items. |
Visual Guide: What a Women’s Tool Kit Should Look Like?
Sometimes, a visual guide is the best answer. How can I easily see what my toolkit should include?
An infographic layout is useful for showing essential and bonus tools. A checklist also helps to categorize different tools. Lastly, a printable version can also be used when shopping.
Visual aids simplify the planning process and ensure you don't miss any essential items. An infographic can showcase how each tool fits into your DIY projects. A checklist makes it easy to track what you already have and what you still need.
Here are some visual guides to consider:
| Visual Aid Type | Description | Benefits |
|---|---|---|
| Infographic Layout | A visual representation of essential and bonus tools, categorized by project type or purpose | Provides a clear overview of the tools needed for various DIY tasks; helps visualize how each tool fits into the overall toolkit. |
| Visual Checklist | A simple checklist with images of each tool, categorized by type | Makes it easy to track which tools you already have and which ones you still need to purchase; visually reinforces the identification of each tool. |
| Printable Version | A downloadable and printable version of the infographic layout and checklist | Allows for easy reference while shopping for tools; provides a physical guide that can be taken to the store for convenient purchasing. |
Tool Kit Budgeting: Spend Smart, Build Right?
Budgeting is important for all DIY beginners. How can I effectively budget for my tool kit?
Consider investing in a cordless drill and safety gear. Save money on fasteners and tape. You can choose buying tools individually or in curated sets.
Effective budgeting ensures you get the most essential tools without overspending. Prioritizing certain tools, like a high-quality cordless drill, and finding cost-effective alternatives for others, such as basic fasteners, can help you make the most of your budget.
Consider the following tips:
| Budgeting Aspect | Recommendations | Why It's Important |
|---|---|---|
| Investments | Spend more on a reliable cordless drill, safety gear (gloves, goggles, dust masks) | A high-quality drill will last longer and perform better; safety gear is essential to protect yourself from injuries. |
| Savings | Save money on fasteners (screws, nails, bolts), tape by buying in bulk or choosing generic brands | Fasteners and tape are often used in large quantities, so buying in bulk can significantly reduce costs; generic brands can offer similar performance at a lower price. |
| Individual vs. Curated Sets | Compare the cost of buying tools individually versus purchasing curated sets | Curated sets may offer a discount compared to buying tools individually, but they may include tools you don't need; evaluate your specific needs to determine the most cost-effective option. |
Are you tired of waiting for someone else to fix things around your house? Do you want to feel empowered to tackle your own home projects? Many women are taking control of their homes, with over 50% preferring to do their own repairs!
Building your own DIY tool kit is the first step! I’ll show you what every woman needs for home improvement, and how to stay safe.
It might seem hard to build your own tool kit, but I will help you. First, let's explore why a tool kit made just for women can make all the difference.
Tool Kit Variations by Project Type
Are you taking on some home repair projects? Or are you creating a crafting space? You don't need the same tool kit for all projects!
There are various tool kit variations, such as a beginner’s home repair kit. Also, tool kits for decorative and interior design. Lastly, there are woodworking and crafting combo kits.
Having a toolkit tailored to the type of projects you enjoy can make your DIY life so much easier. It means you're not lugging around tools you will never use. It can also ensure you have the appropriate tools to safely complete your projects!
Here's a look at the variations by project:
| Project Type | Key Tools | Why These Tools? |
|---|---|---|
| Beginner's Home Repair Kit | Screwdriver set, hammer, pliers, adjustable wrench, tape measure, level, utility knife, safety glasses | Essential for basic fixes like tightening screws, hanging pictures, and repairing leaky faucets; provides a foundation for more advanced repairs. |
| Decorative and Interior Design Kit | Measuring tape, level, stud finder, picture-hanging kit, paintbrushes, rollers, painter's tape, drop cloths, hot glue gun | Ideal for decorating, organizing, and personalizing your living space; allows you to hang pictures, paint walls, and create decorative accents. |
| Woodworking and Crafting Combo Kit | Hand saw, clamps, wood glue, sandpaper, rotary cutter, cutting mat, hot glue gun, embroidery needles, fabric scissors, ruler | Combines the tools needed for cutting, shaping, and joining wood with the tools for crafting projects; offers versatility for a wide range of creative endeavors. |
First-Time DIYer? Mistakes to Avoid
Starting DIY can be daunting. What should you avoid when starting?
Don’t buy tools just because they look cute or are "for women." Be careful of overloading your kit too early. Lastly, avoid starting with advanced projects without preparation.
Avoiding common mistakes can save you time, money, and frustration. Focus on learning the basics and avoiding the impulse to buy unnecessary tools. Take baby steps!
Here are some common pitfalls:
| Mistake | Advice | Why It Matters |
|---|---|---|
| Buying Tools for Looks | Prioritize functionality and quality over aesthetics; research tool specifications and user reviews before making a purchase; avoid buying tools solely based on color or branding. | Ensures you're investing in tools that will perform well and last longer; helps avoid wasting money on tools that are poorly made or unsuitable for your needs. |
| Overloading Your Kit Too Early | Start with a basic set of essential tools and gradually add more specialized tools as needed; assess your project requirements and buy tools accordingly; avoid buying tools you're unlikely to use in the near future. | Prevents your toolkit from becoming cluttered and overwhelming; makes it easier to find and access the tools you need; avoids wasting money on tools that will sit unused. |
| Starting with Advanced Projects | Begin with simple, beginner-friendly projects like hanging pictures or assembling furniture; gradually increase the complexity of your projects as your skills and confidence grow; seek guidance from experienced DIYers and online tutorials. | Minimizes the risk of making mistakes and becoming discouraged; allows you to build a solid foundation of skills and techniques; ensures you're prepared for more challenging projects. |
How to Maintain and Care for Your Tools
Having the right tools means keeping them in the best condition! How to keep your tools ready for use?
You should clean and store tools properly to prevent rust. Follow battery care tips for cordless tools. Lastly, know when to sharpen, oil, or replace parts.
Proper tool care extends the lifespan of your equipment. It ensures they're always ready for use. Taking the time to maintain your tools will save you money. It also prevents frustration in the long run.
Here are some tool maintenance tips:
| Maintenance Task | Recommendations | Why It Matters |
|---|---|---|
| Cleaning and Storing | Clean tools after each use with a cloth or brush; store tools in a dry, organized space; use rust inhibitors or oil to protect metal surfaces. | Prevents rust, corrosion, and damage to tools; makes it easier to find and access the tools you need; extends the lifespan of your equipment. |
| Battery Care for Cordless | Follow manufacturer's instructions for charging and storing batteries; avoid overcharging or completely depleting batteries; store batteries in a cool, dry place; clean battery terminals regularly. | Maximizes battery life and performance; prevents battery damage and failure; ensures your cordless tools are always ready for use. |
| Sharpening, Oiling | Sharpen blades and cutting edges regularly to maintain sharpness; oil moving parts to reduce friction and prevent wear; inspect tools for loose or damaged parts and repair or replace them as needed. | Ensures tools perform optimally and safely; reduces the risk of accidents caused by dull blades or worn parts; extends the lifespan of your equipment. |
Join the DIY Sisterhood: Communities & Learning Resources
Learning and growing is important in the DIY world. How do you connect and learn?
Check out the best YouTube channels for DIY beginners. Recommended forums include Reddit DIY and Facebook Groups. And also, newsletters, podcasts, and project-planning apps.
Connecting with other DIYers can provide valuable support, inspiration, and guidance. There is a whole community out there ready to assist you and cheer you on! Learning resources can also save you some serious frustration!
Here are some online resources that are helpful:
| Resource Type | Recommendations | Benefits |
|---|---|---|
| YouTube Channels | April Wilkerson, Ana White, Home RenoVision DIY | Provides visual tutorials and demonstrations of DIY projects; offers step-by-step instructions and helpful tips; covers a wide range of DIY topics. |
| Online Forums | Reddit DIY, Facebook Groups (e.g., "DIY Home Improvement"), DIYChatroom.com | Connects you with other DIYers for support, advice, and inspiration; allows you to ask questions and share your projects; provides a sense of community and belonging. |
| Newsletters and Podcasts | "DIY Magazine," "The Money Pit," "Young House Love Has a Podcast" | Delivers tips, trends, and project ideas straight to your inbox; offers expert advice and insights on home improvement; keeps you up-to-date on the latest DIY news and developments. |
Where to Buy the Best Women’s Tool Kits
Knowing what tools to use is important. But knowing where to buy them is also essential!
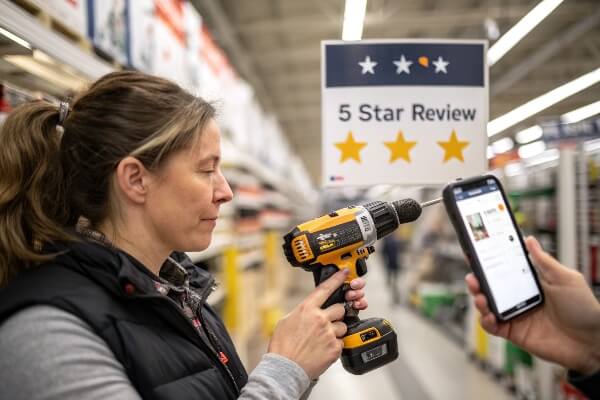
Consider online options like Amazon, Etsy, and niche brands. In-store options include Home Depot, Lowe’s, and Target. Don't forget to look for reviews, returns, and ergonomic design when buying.
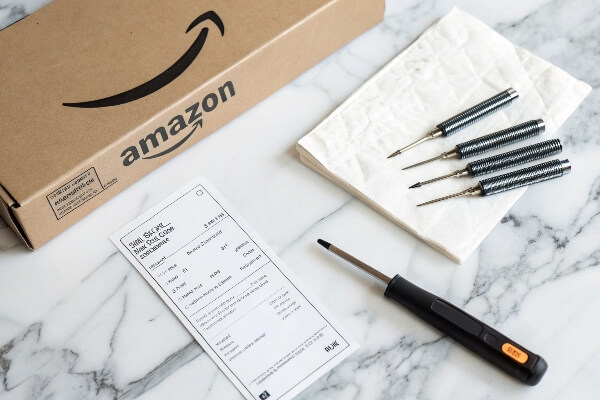
Knowing where to find the best deals and quality tools is critical. Online stores offer convenience and a wide selection, while local stores provide the opportunity to see and feel the tools before you buy them. Reviews can also help you with decisions when buying online.
Here are a few shopping ideas:
| Shopping Option | Recommendations | Benefits |
|---|---|---|
| Online Retailers | Amazon, Etsy, specialized online tool stores | Offers a vast selection of tools and brands; provides detailed product descriptions and customer reviews; allows for easy price comparison; fast shipping and convenient returns. |
| In-Store Retailers | Home Depot, Lowe's, Target | Allows you to see and feel the tools before buying; provides opportunities to ask questions and get expert advice; convenient for immediate purchases; can offer in-store promotions and discounts. |
| Reviews and Ergonomics | Look for tools with positive reviews, comfortable grips, and lightweight designs; consider the tool's ergonomics and how it fits in your hand; read reviews from other women DIYers for insights. | Provides valuable information about the tool's performance and durability; ensures the tool is comfortable and safe to use; helps you make an informed decision when buying tools. |
Frequently Asked Questions (FAQs)
Have some lingering thoughts? Here are some frequently asked questions!
What tools should every woman have? Are pink tools just marketing? How do I start DIY with no experience?
Addressing common questions upfront can build trust. It also provides quick answers. Having a specific FAQ section can boost the overall SEO of your content.
Here are common questions:
| Questions | Answer |
|---|---|
| What tools should every woman have? | A basic toolkit should include a cordless drill, hammer, screwdriver set, tape measure, level, pliers, and utility knife. |
| Are pink tools just marketing? | While pink toolss may be marketed towards women, focus on functionality and quality, not just appearance. |
| How do I start DIY with no experience? | Start with simple projects, watch online tutorials, join DIY communities, and gradually increase the complexity of your projects as your skills grow. |
Conclusion
It all comes down to building a tool kit that can empower you! It's about having the confidence and capability to tackle any home project. Download the checklist or start with 5 core tools today!
 How to Build the Perfect Tool Kit for Women’s DIY Projects
 Beginner's Women's Tool Kit: Are You Ready?
 How to Safely Use Power Tools? Key Rules & Tips for 4 Tools?
 How to Choose the Right Power Tool Types